


Setting Up
After creating a new presentation with the template, you may find that tables come in the form of placeholders. Clicking the placeholder button will allow you to create a basic table with the allotted number of rows and columns that you need.
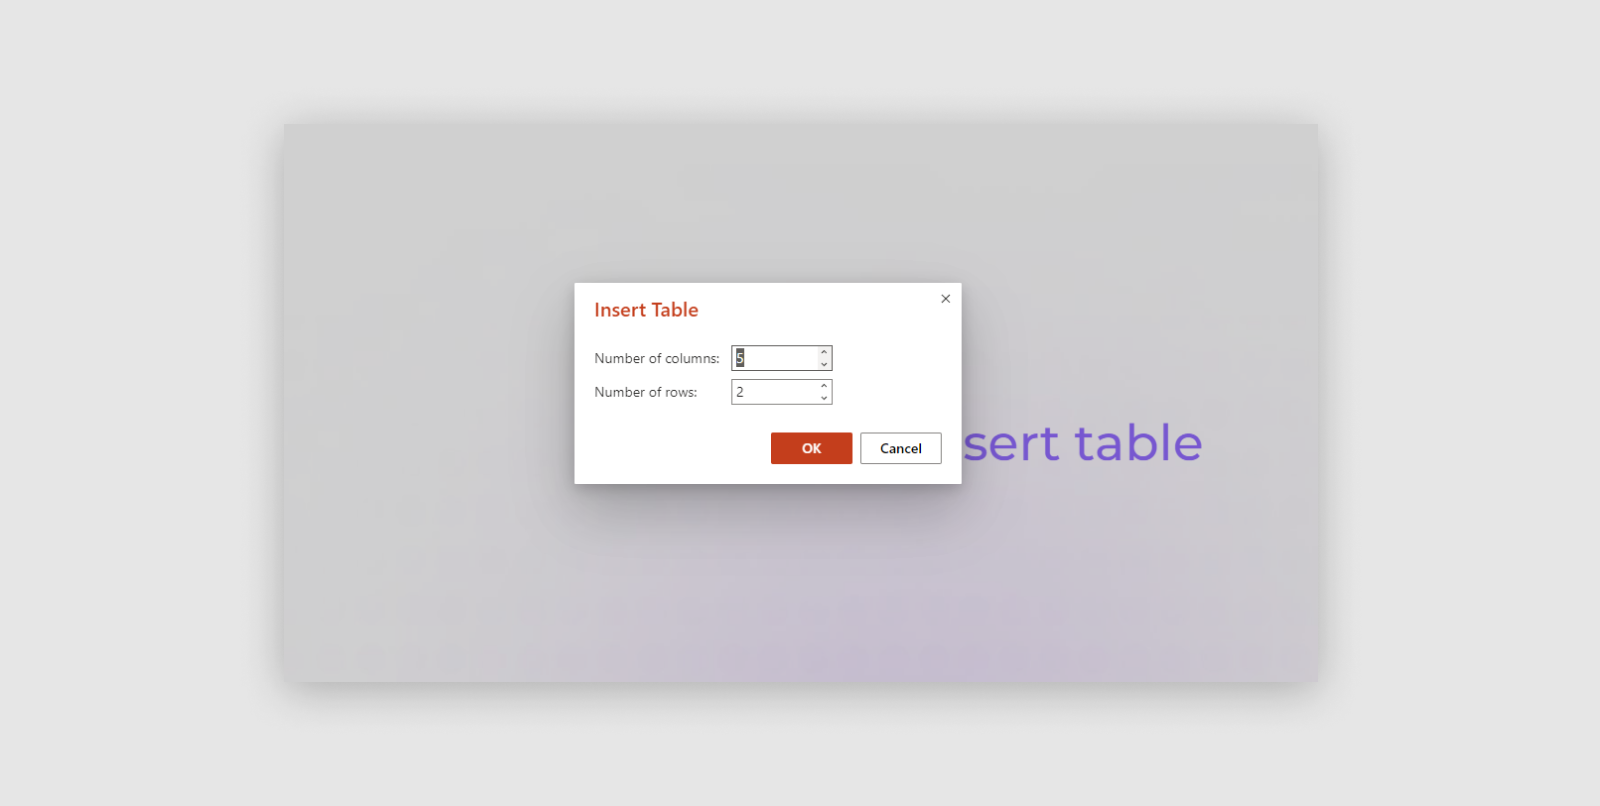
Table Styling
After selecting your options, you can then navigate to the ‘table’ header, where you can select whether you would like the highlighted cells to be at the top or the side, as shown.
Rows and Columns
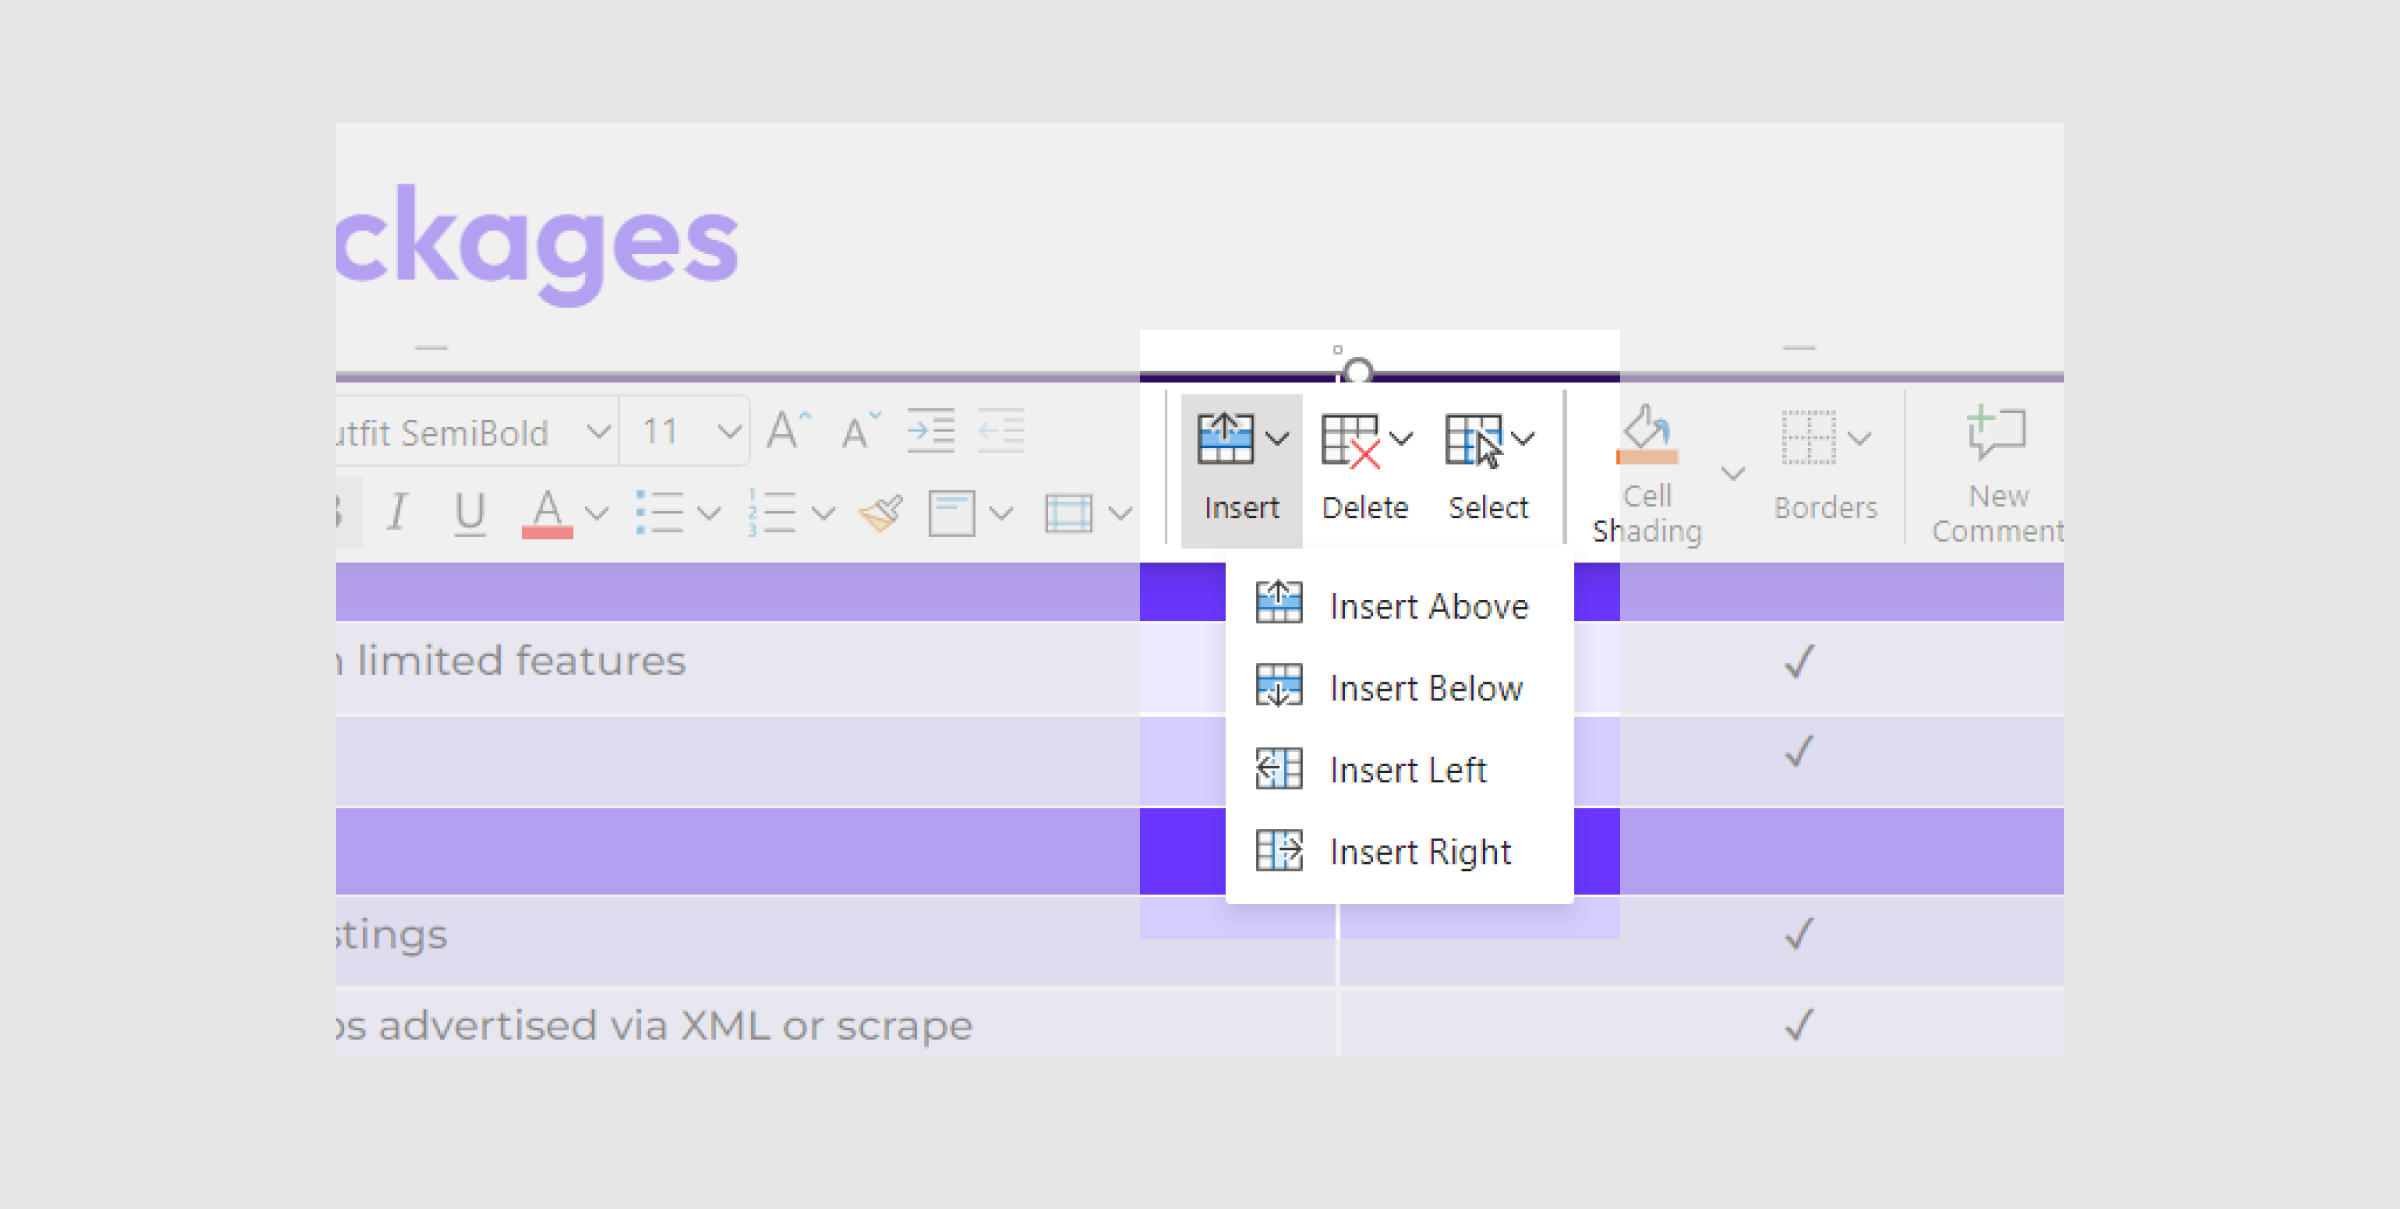
Should you decide at this point that you need more / less rows or columns, you can easily remove or add them from the menu after right clicking.
Colors
Colors for the table should be followed correctly, below are examples of what table colours you should use and which ones you shouldn’t use.
{{yes-no}}
Fonts
As with the main design slides, please ensure you use ‘Outfit’ as the main header for tables, and ‘Montserrat’ for any body copy within the table.
Resizing Tables
Please ensure tables always fill the full width and height of the page. The width should always be correct, however, after adding your content please make sure to resize the table to fit accordingly.
Note: If text starts to overlap into other boxes, please reduce the size of the text within the table.
{{table-sizing}}


